vCloud Availability (vCAV) is a comprehensive solution for disaster recovery and seamless migration of vApps and virtual machines (VMs). It supports on-premises-to-cloud, cloud-to-cloud, and cross-organizational migration with minimal downtime.
There are two ways to manage vCloud Availability for our resources:
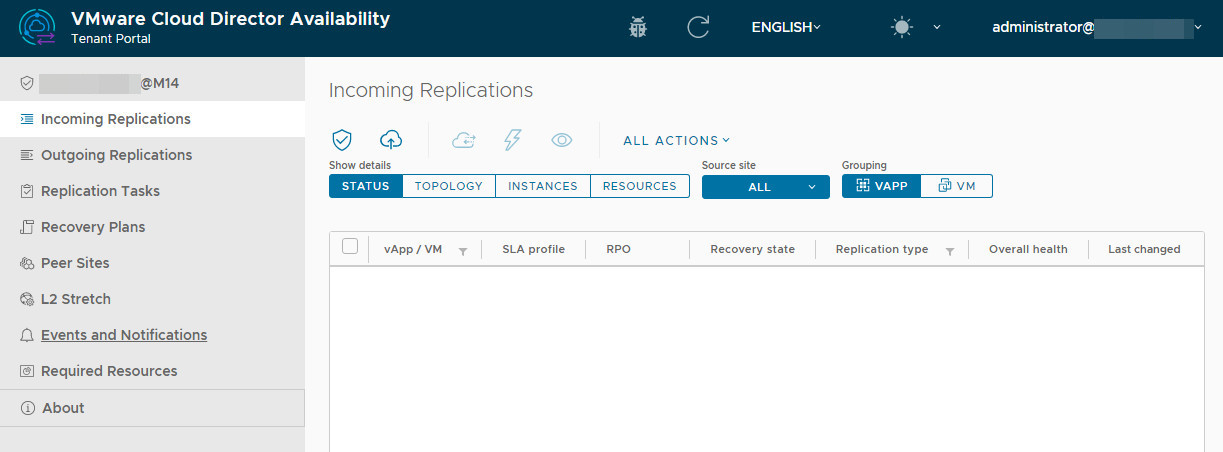
Accessing the vCAV Portal
You can manage vCAV through two interfaces:
-
Dedicated vCAV Portal:
-
M14 Cluster:
https://vcav-m14.cloud4y.ru:443 -
FZ Cluster:
https://vcav-fz.flexcloud.ru:443 -
Credentials: Use your
administrator@<organization-name>account.
-
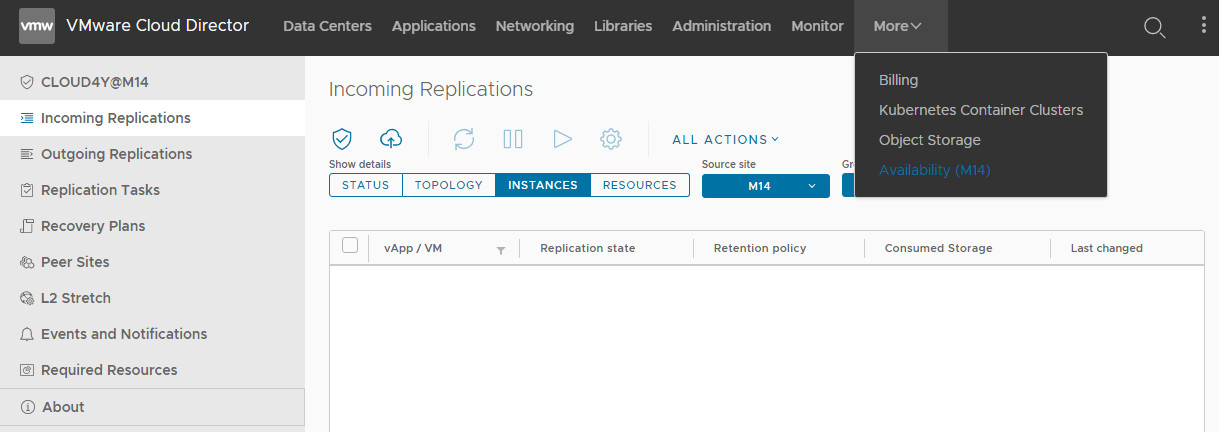
2. VMware Cloud Director Portal:
-
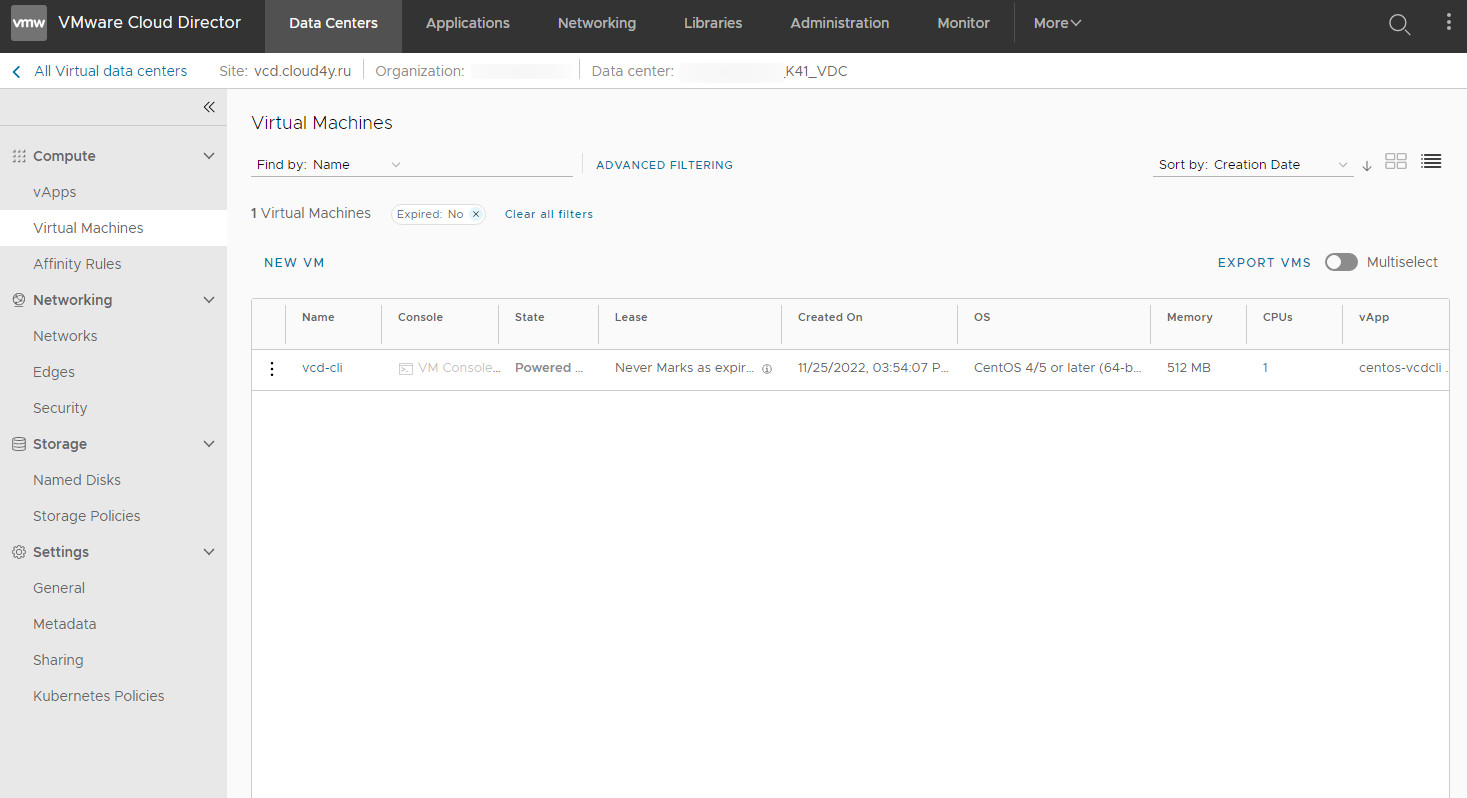
Access vCAV functionality directly from your organization's vCloud Director interface.
Replication Job Types: Migration vs. Protection
vCAV offers two primary replication modes:
-
Migration: Permanently moves a vApp/VM to a remote organization. The source VM is shut down, synchronized, and then activated at the target site.
-
Protection: Provides ongoing fault tolerance. VMs are continuously synchronized (hot sync). If the source site fails, VMs are instantly powered on at the destination. This mode supports multiple recovery point snapshots and allows for non-disruptive migration.
Configuring a Migration Job
-
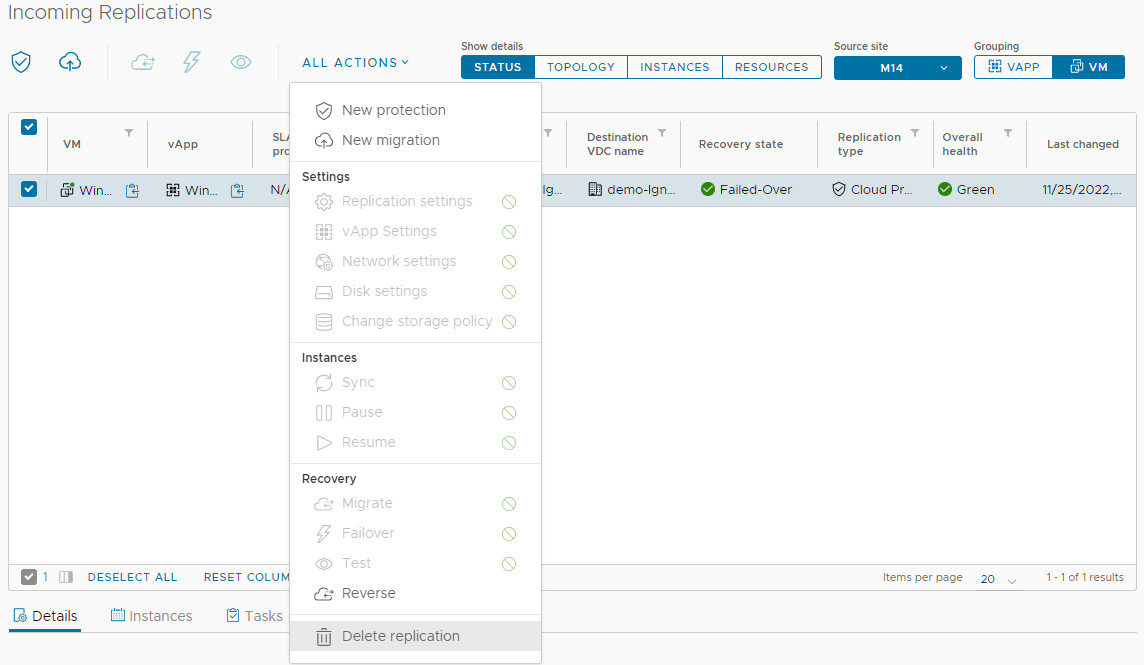
Initiate: From the vCAV portal, go to All Actions > New Migration.

2. Select Source: Choose the source site and provide the source organization's (vOrg) credentials.


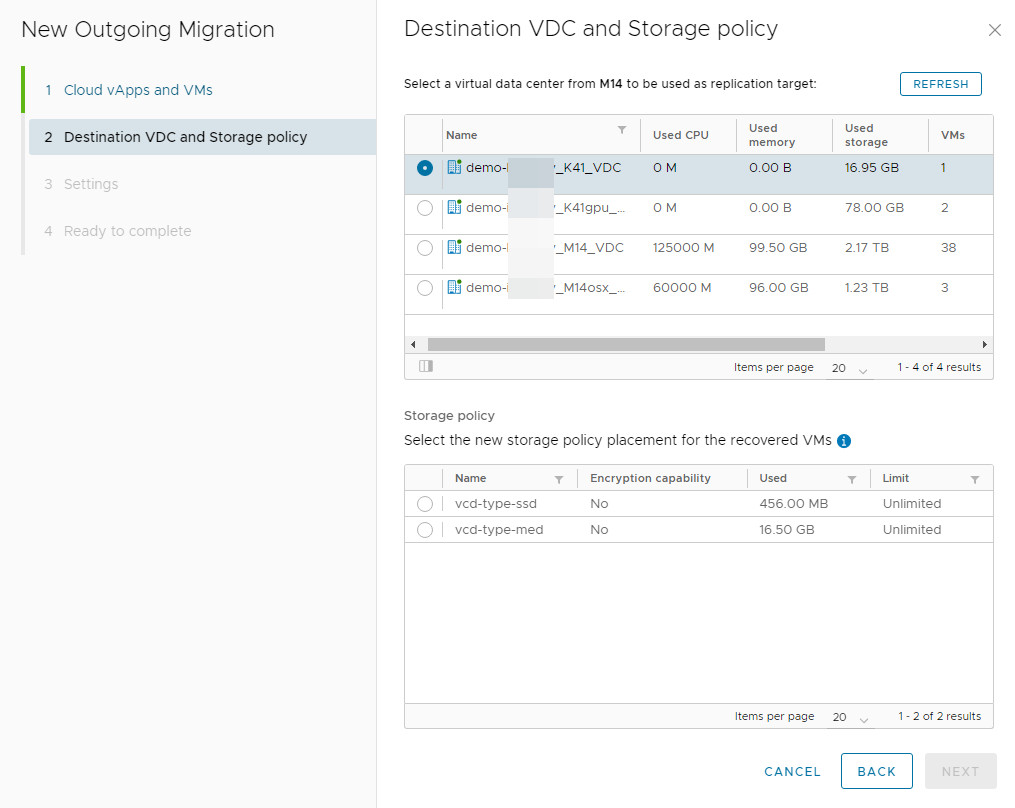
3. Choose Target: Select the target virtual data center (vDC) and its storage policy.
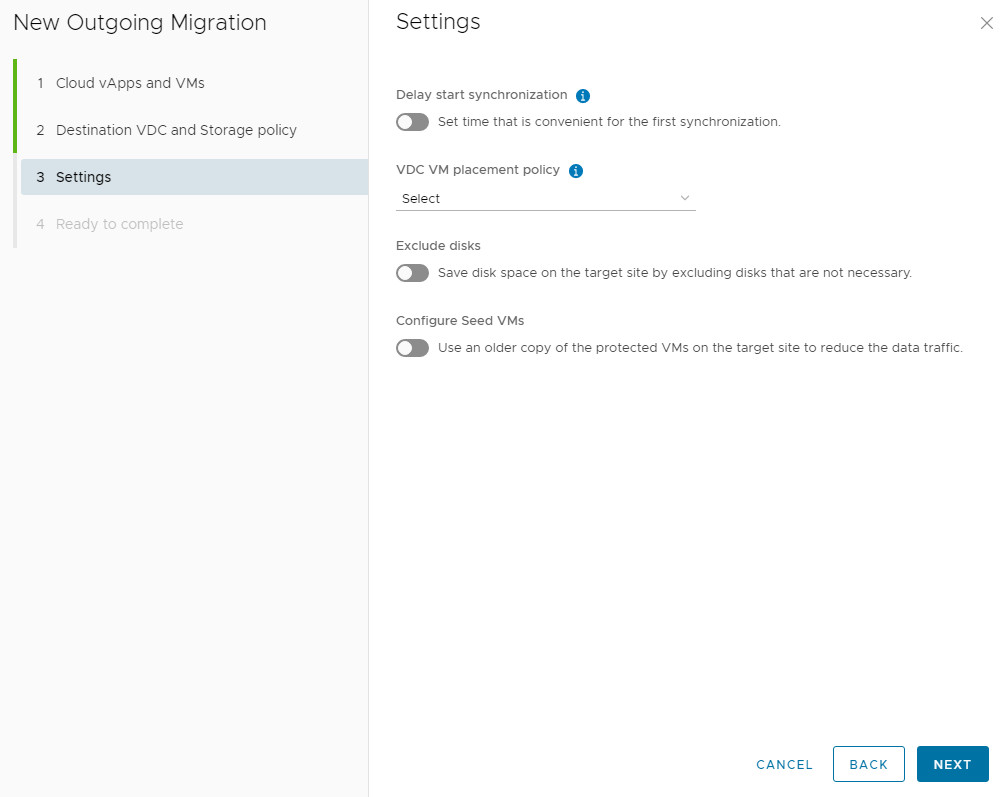
4. Configure Settings:
-
Delay Synchronization: Optionally postpone the initial sync.
-
Exclude Disks: Remove non-essential disks from replication to save space and bandwidth.
 ,
,
- Configure Seed VM: If a previous copy exists at the target, use it as a base to drastically reduce sync time and traffic.
Once the replication job has been created, its current status is displayed in the console:
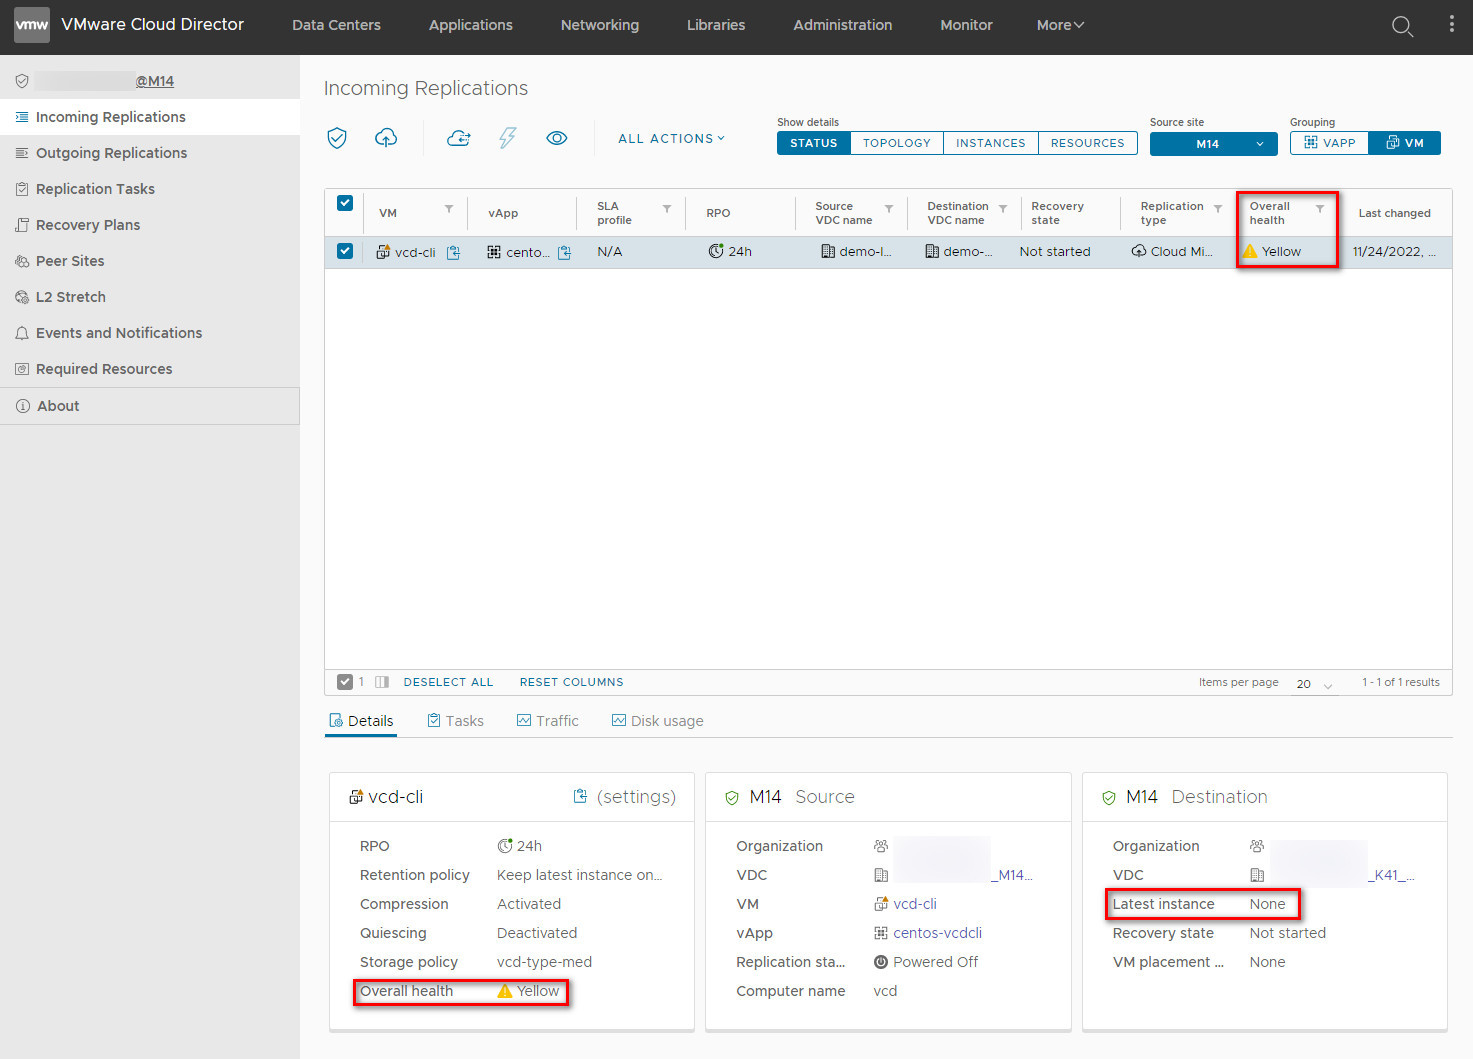
In this case, the replication status (overall health) is yellow because no action has been taken on the job.
The Latest instance field indicates that there is no instance in the target.
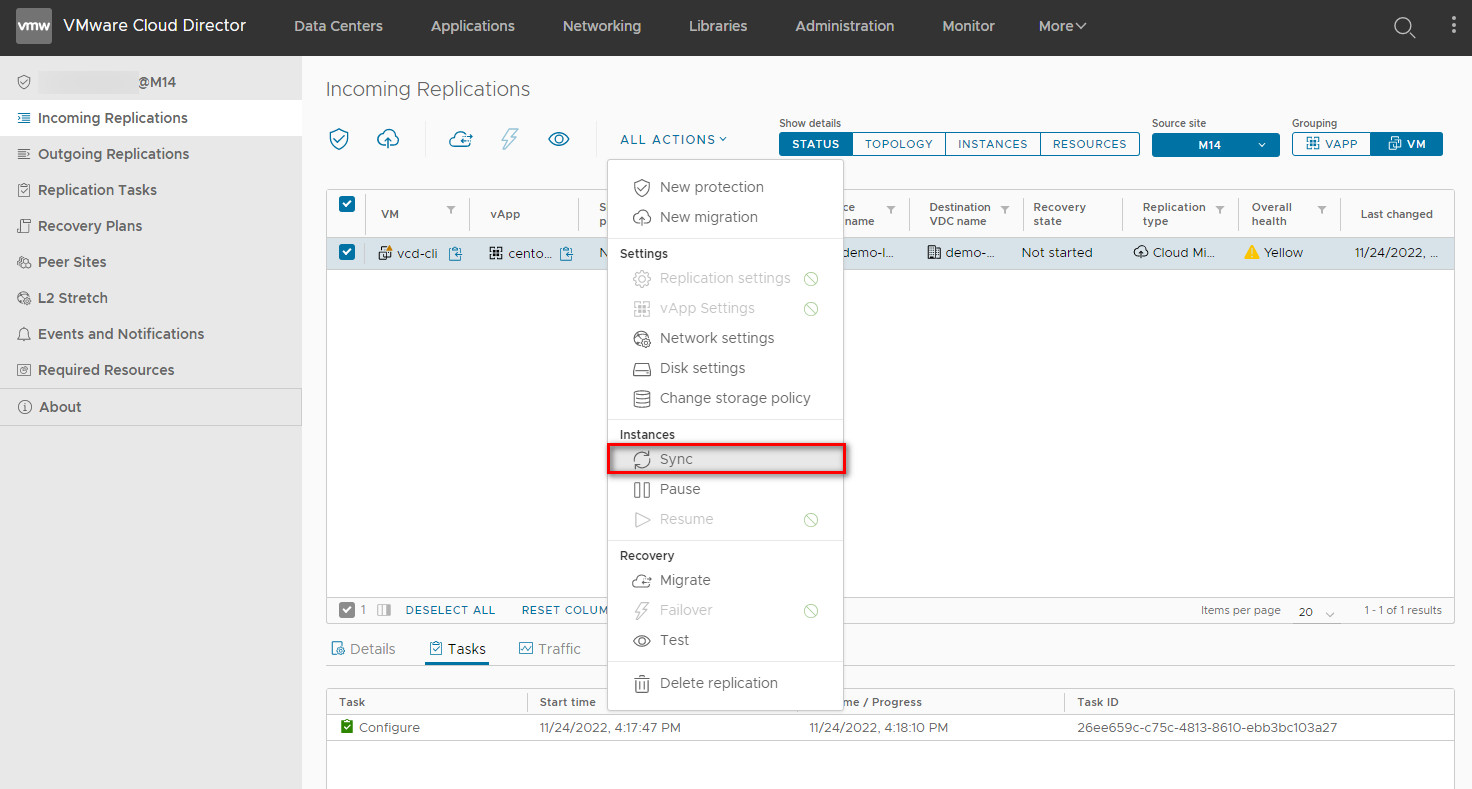
It is not necessary to synchronise to create an additional instance, but if you need to reduce the migration time, you can do it manually.
Finalizing the Migration
-
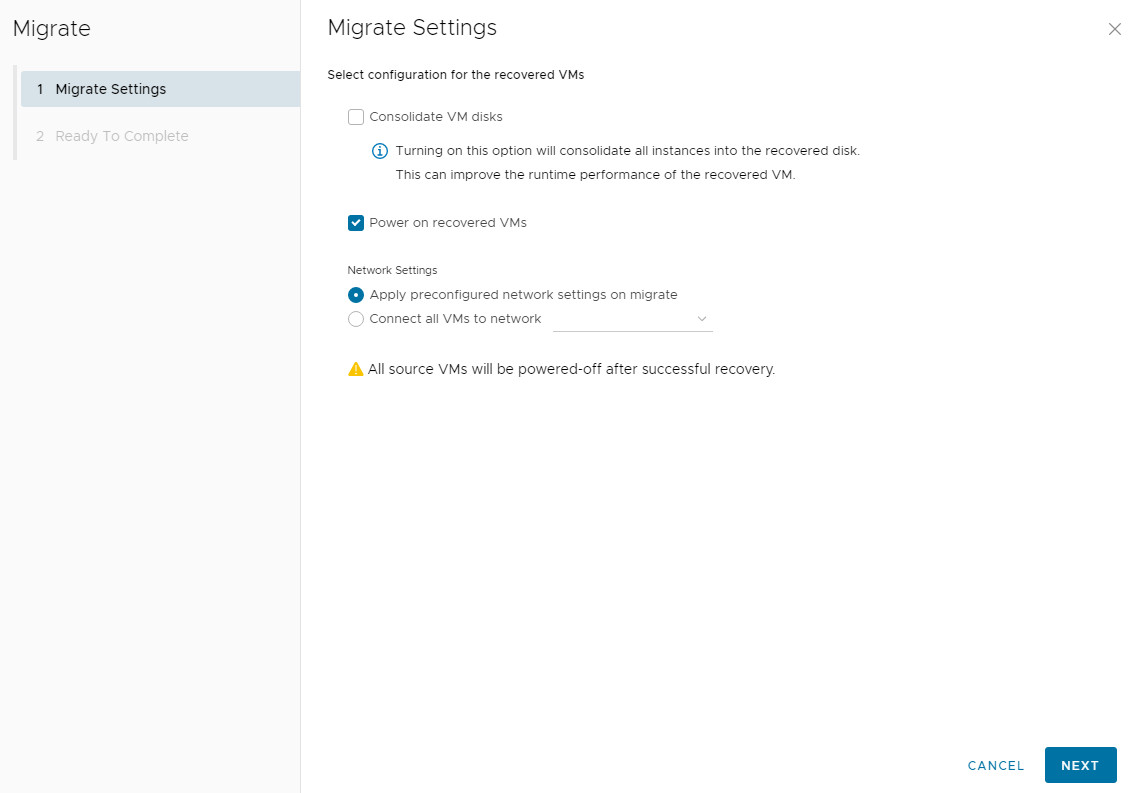
Select the synced VM/vApp and click All Actions > Migrate.
Finalizing the Migration
-
Select the synced VM/vApp and click All Actions > Migrate.

2. Configure Post-Migration Settings:
-
Power on VM: Start the VM automatically after migration.
-
Network Settings: Choose to retain source settings or connect to new networks at the destination.
3. The process will: perform a final sync, power off the source VM, import to the target, and power on the new VM.
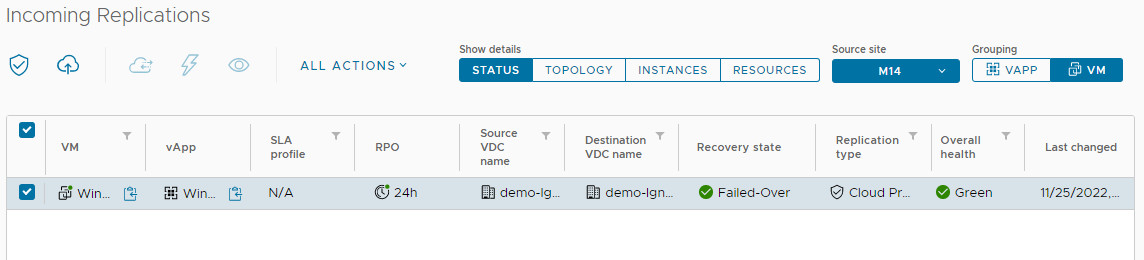
After Migration
The job status becomes Failed Over. You have two options:
-
Reverse: Creates a new replication job back to the source site (deletes the old job).
-
Delete: Removes the replication job. The migrated VMs remain intact.

Configuring a Protection Job
-
Initiate: Go to All Actions > New Protection.

2. Select Source & Target: Follow the same steps as migration to select the vApp/VM and target vDC.


3. Set RPO (Recovery Point Objective): Define the maximum acceptable data loss window (e.g., 15 mins, 1 hour, 4 hours). This determines how often syncs occur.

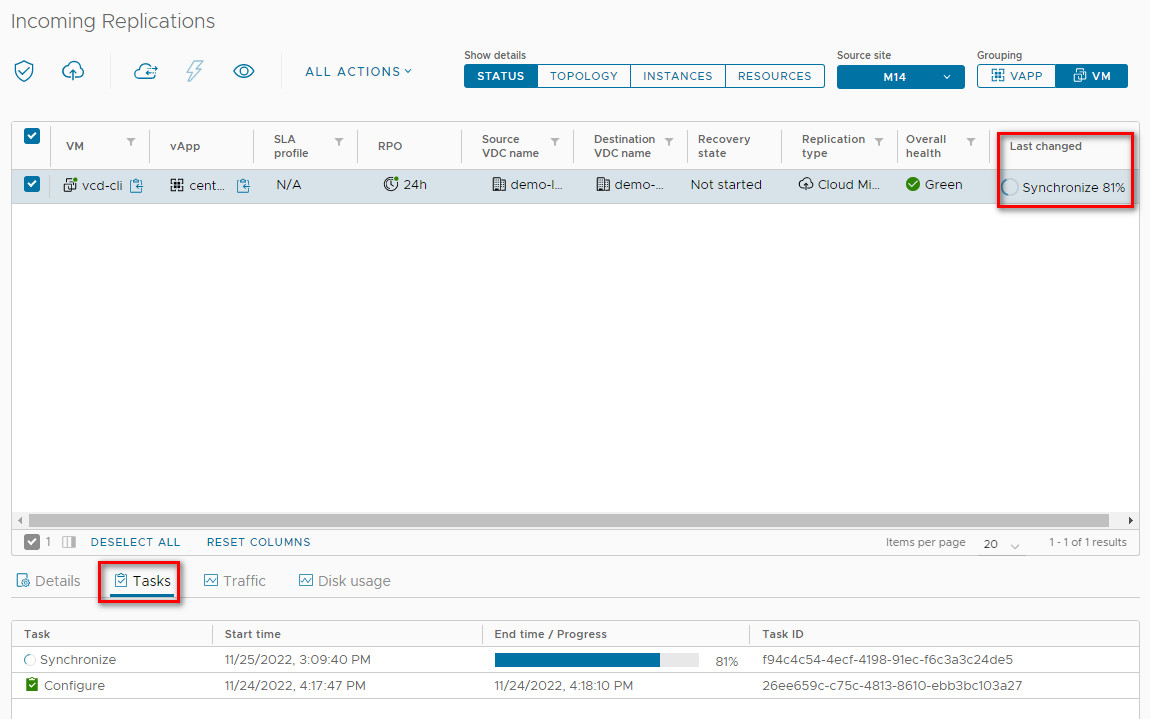
4. Monitor Sync: Synchronization begins immediately. Check the Replication Status and use Show Details to view instances (recovery points).

The replication status is displayed in the Source -> Replication Status field.
The 'Show details' buttons allow you to change the information displayed in the console.

In this case, the Instances mode allows you to check the recorded instances on replication jobs that can be applied later during recovery.
When synchronization is complete, each instance of the VM exists as a Named Disk. Failover deploys this disc as a full VM. This significantly reduces the time required to recover a VM, but takes up additional space in the cloud.

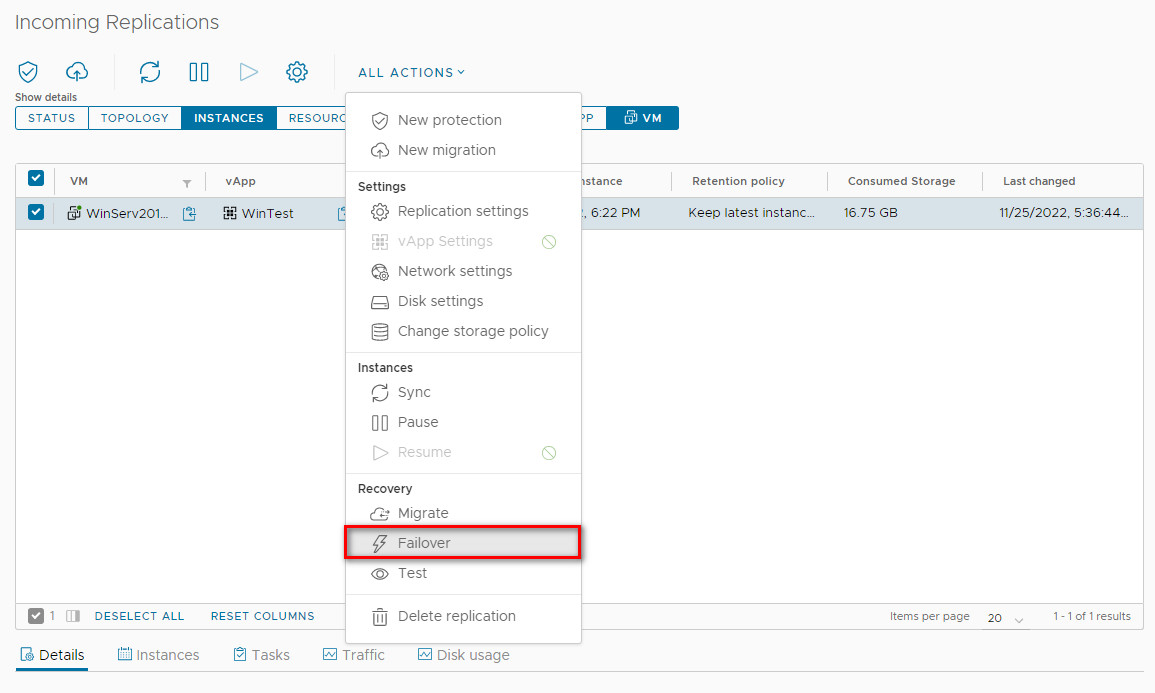
Performing a Failover (Recovery)
-
Select the protected VM and click All Actions > Failover.
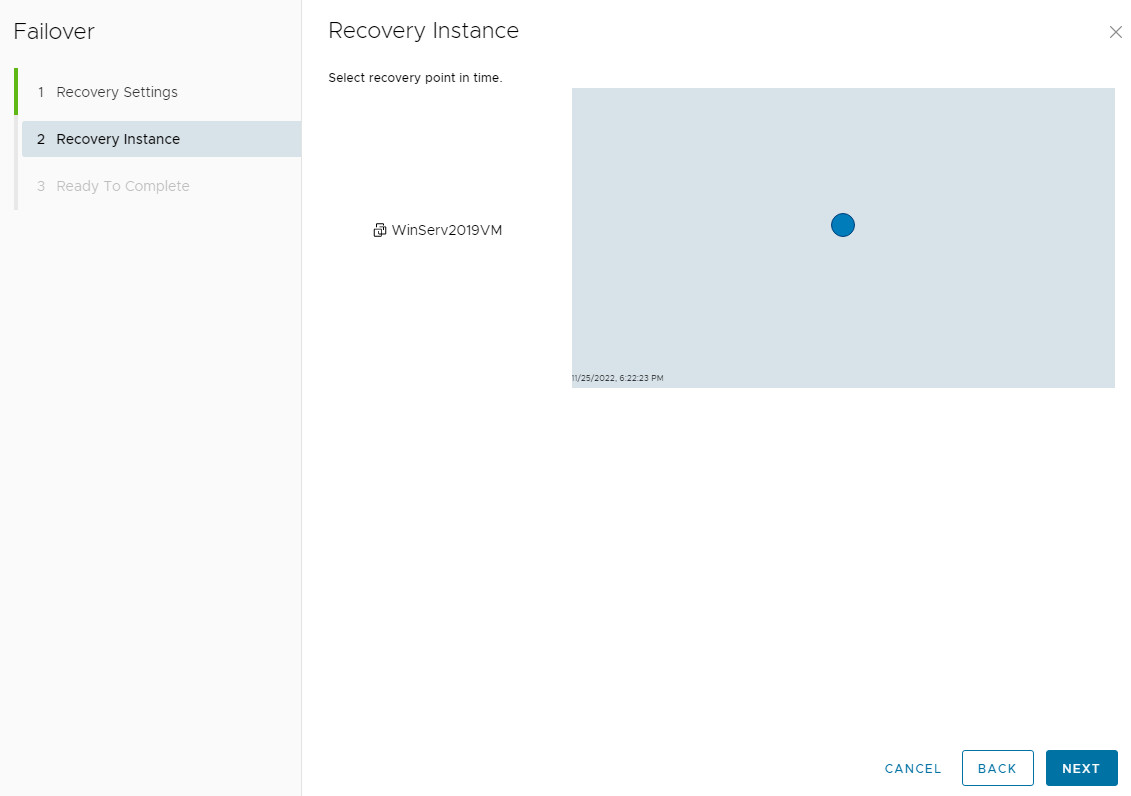
2. Choose Recovery Point: Select which instance (snapshot) to recover from, based on the RPO.
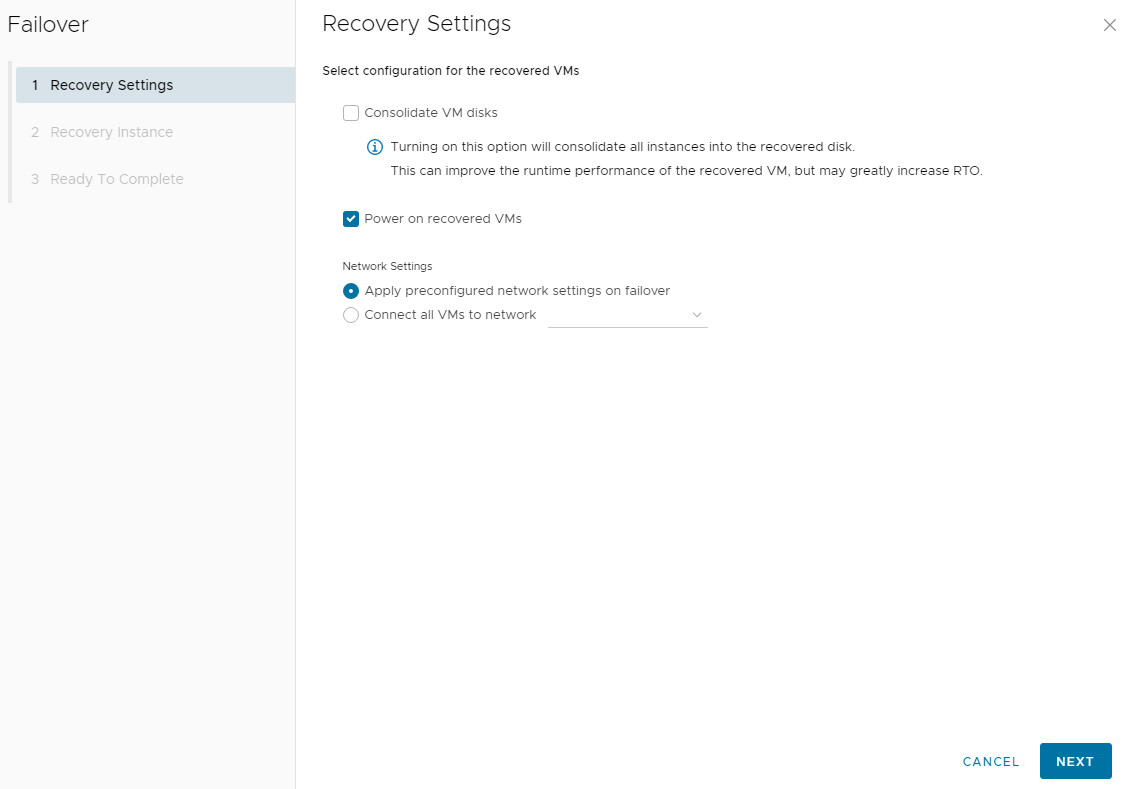
3. Configure Network Settings: Choose power-on and network connectivity options for the recovered VM.
4. After successful failover, the job status becomes Failed Over. Use Reverse to re-protect the VM or Delete to remove the job (this only deletes the replication instances, not the recovered VM).
You can then either perform a reverse replication using Reverse in the All Actions menu, or delete the replication job. If you delete a replication, only the remaining instances of VMs that are located on named disks will be deleted.
Replication Overall Health Statuses
Overall Health displays the overall health status of the replication with colour coding.
|
Status |
Description |
|---|---|
|
Green |
No issues detected. |
|
Yellow |
A potential issue exists; check sync status. |
|
Red |
Replication has failed and requires manual intervention. |
Recovery States
|
State |
Description |
|---|---|
|
Not started |
A recovery operation (Failover) has not been initiated. |
|
Complete |
The recovery operation has finished successfully. |
|
Test Image Ready |
A test failover was completed successfully. |
|
Recovering |
The failover process is currently in progress. |
|
Reversed |
Replication has been configured in the reverse direction. |
|
Unknown |
The status cannot be determined. |
