This tutorial describes the site-to-site IPsec VPN configuration between Cloud4U (Edge Gateway) and a client site using Mikrotik, assuming the client has two Internet Service Providers (ISPs) connected to Mikrotik: a primary ISP and a backup ISP.
We will configure the VPN using the VMware Cloud Director web interface and Winbox, and we will use RouterOS version 6.48.1 on Mikrotik.
The goal is to establish an IPsec tunnel between the Edge Gateway and the Mikrotik router, even if there are two ISPs connected to the router. If one of the ISPs fails, the other ISP should take over. Additionally, we want to be able to switch back to the preferred ISP (ISP1) if it becomes available again.
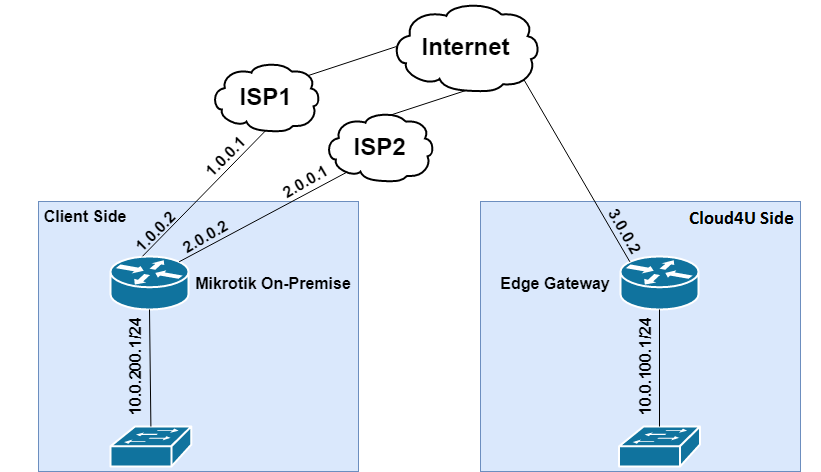
Here's a diagram of the test setup we'll use for our configuration:
Configuring Edge Gateway
Configuring IPsec on Edge Gateway
Go to Networking -> Edge Gateways, click on the "dot" to the left of the Edge Gateway, and select Services.

Go to VPN -> IPsec VPN -> IPsec VPN Sites -> «+».

Create IPsec VPN Site.
in the fields Local ID и Local Endpoint specify the external IP address of the Edge Gateway.
In the field Local Subnets specify the networks behind the Edge Gateway that will be routed through the tunnel.
in the field Remote Subnets specify the networks behind the Mikrotik that will be routed through the tunnel.
Fill in the rest of the fields as in the screenshot below.
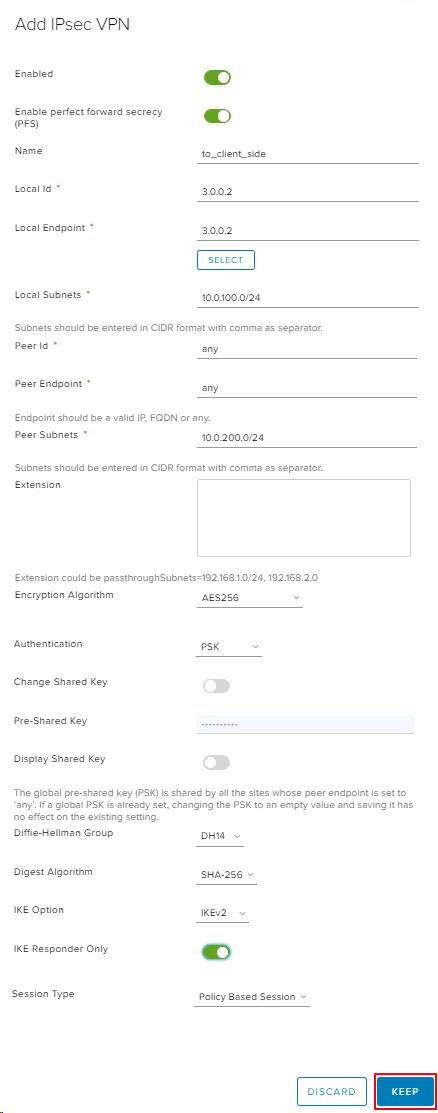
Click KEEP to apply the parameters.
Save parameters by clicking Save Changes.

Go to VPN -> IPsec VPN -> Global Configuration. Enable Change Shared Key, enter PSK to the field Pre-Shared Key, save changes.
Note: make up (generate) a complex PSK. Do not use the PSK from these instructions.

Go to VPN -> IPsec VPN -> Activation Status, enable IPsec VPN Service Status and click Save changes.

Configuring Firewall on Edge Gateway
To pass traffic between the subnet behind the Edge Gateway and the subnet behind the Mikrotik, create rules in the Firewall.
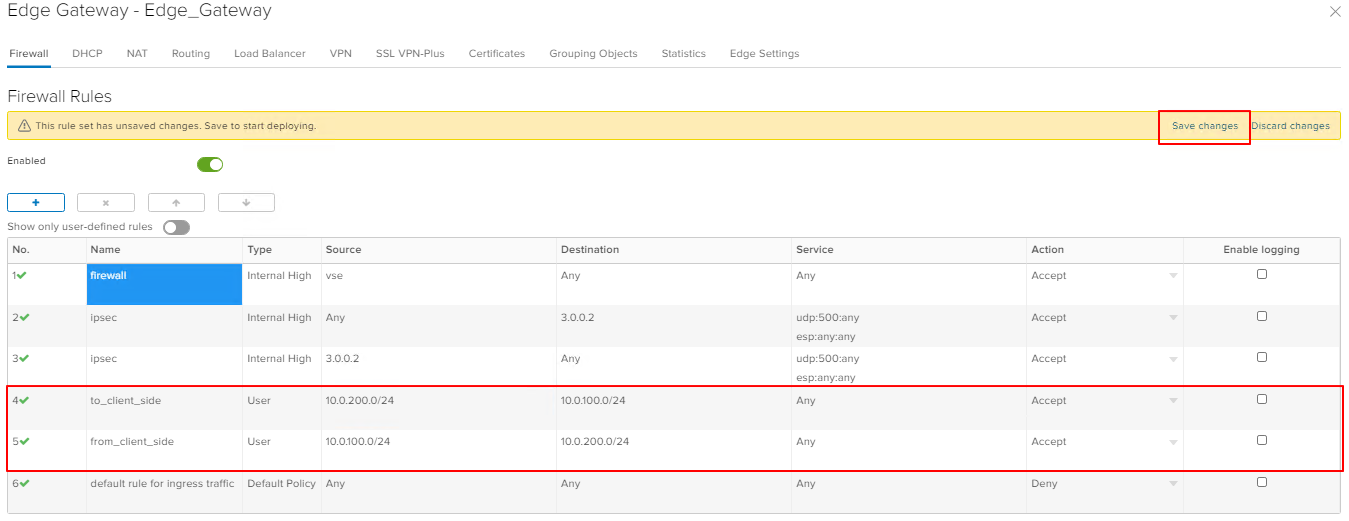
Configuring Edge Gateway is completed.
Configuring Mikrotik
Description of the basic Mikrotik configuration
The instructions assume that the basic configuration has already been done.
The list of interfaces, assigned addresses, and existing routes are shown in the screenshot. In the routing table, we see that the default route through ISP1 is higher priority than through ISP2.
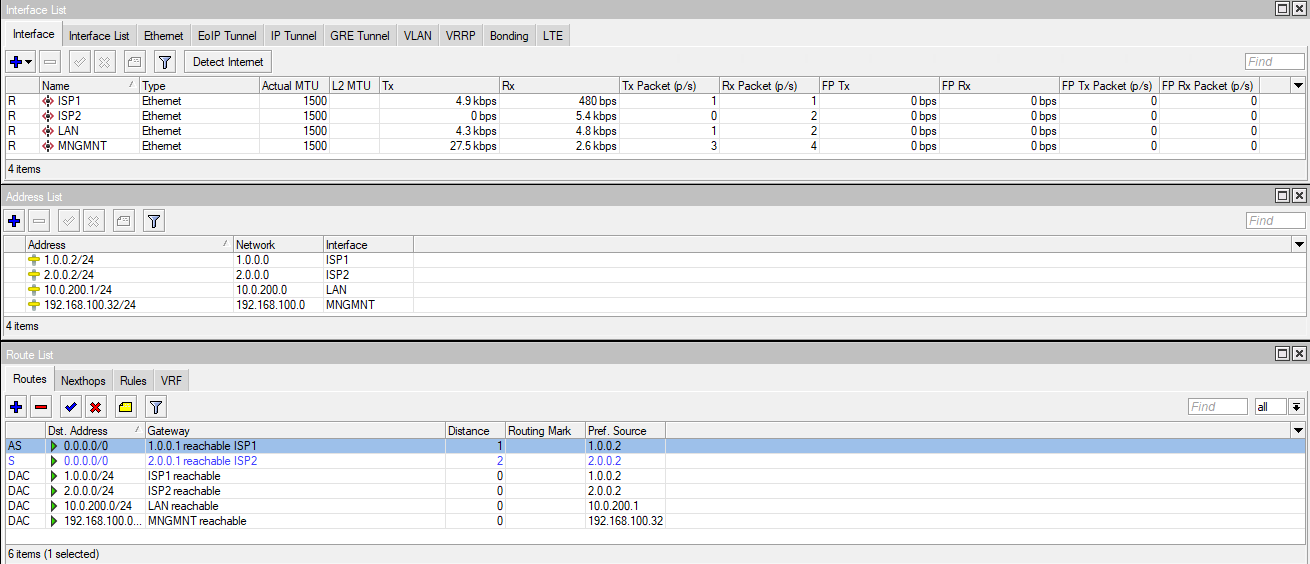
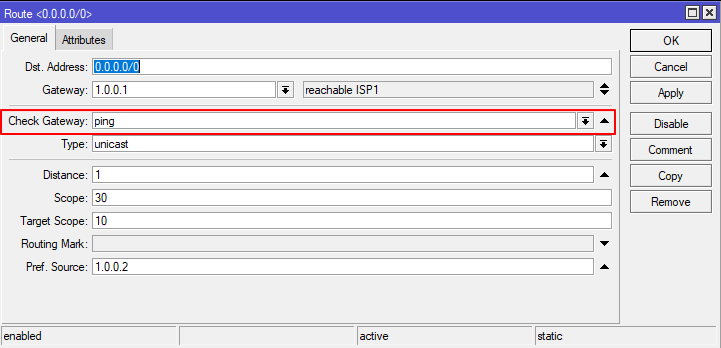
Also, the Check Gateway option is enabled by default for each route.
Note: The Check Gateway option will disable a route if the Gateway of that route does not respond to an icmp request within 30 seconds.
Configuring IPsec on Mikrotik
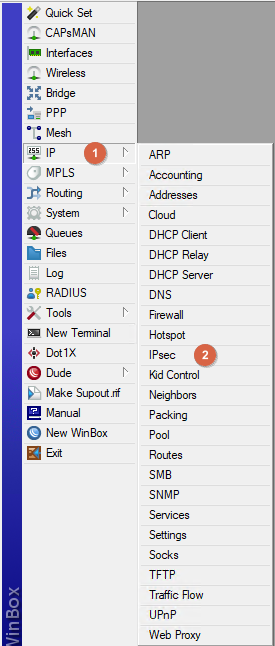
Go to IP -> IPsec.
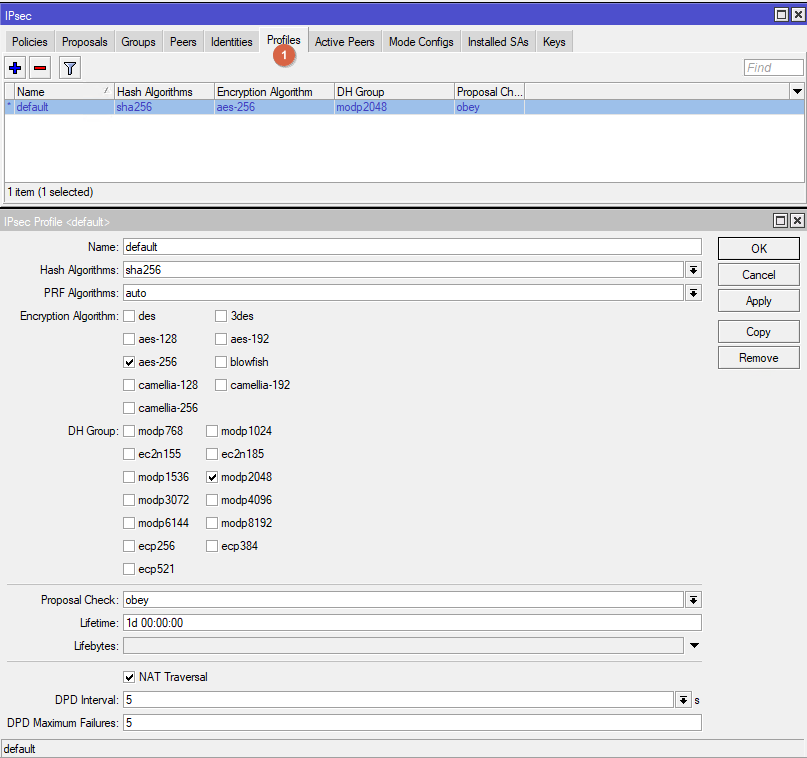
Go to Profiles. Edit the existing default profile. Follow the parameters from the screenshot.
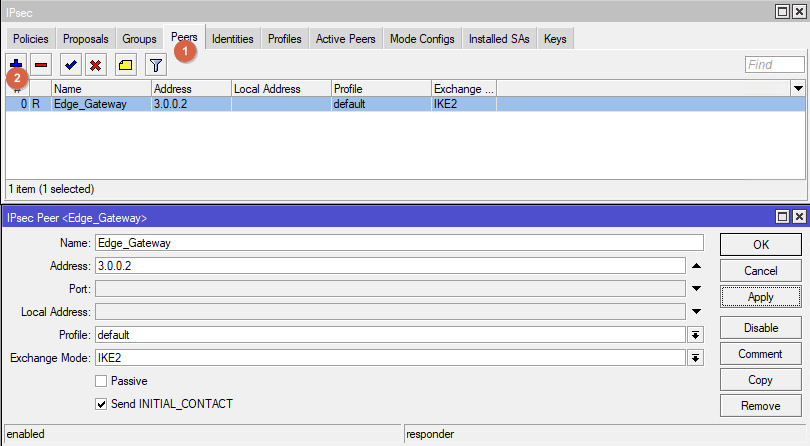
Go to IPsec -> Peers. Create new Peer. Follow the parameters from the screenshot.
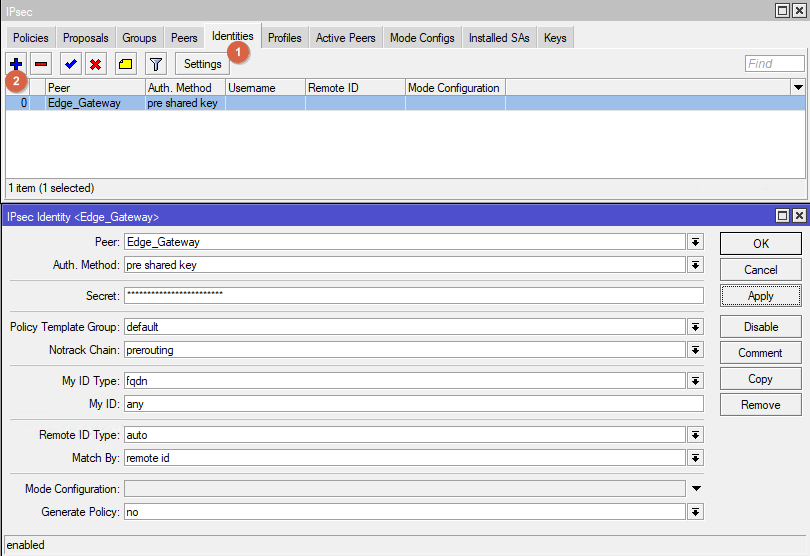
Go to IPsec -> Identities. Create a new Identity. Follow the parameters from the screenshot.
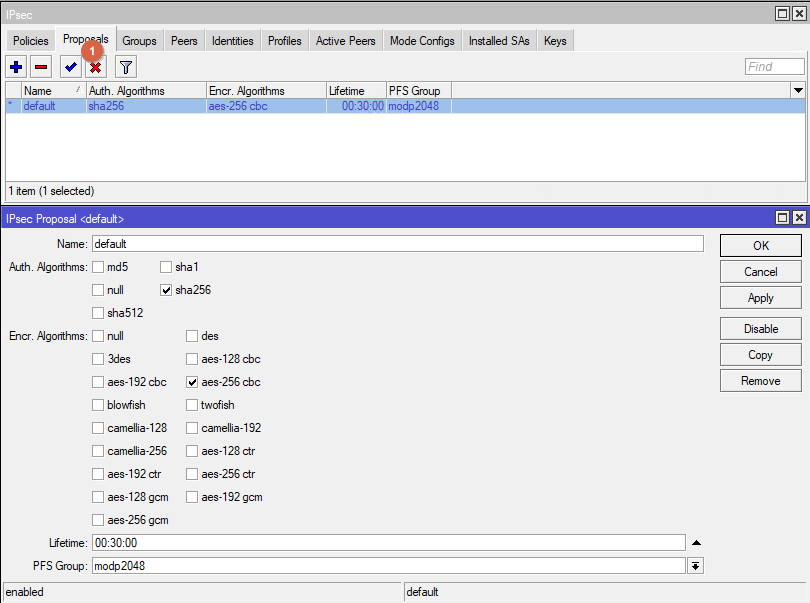
Go to IPsec -> Proposals. Edit Proposal default. Follow the parameters from the screenshot
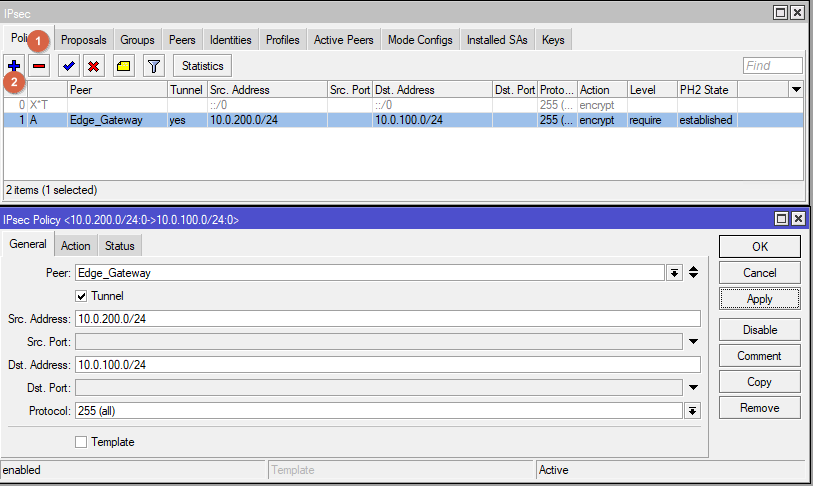
Go to IPsec -> Policies. Create new Policy. Follow the parameters from the screenshot.
in the field Src. Address enter the subnet address of the Mikrotik;
in the field Dst. Address specify the address of the subnet behind the Edge Gateway.
At this point the IPsec configuration is complete.
The tunnel will be established from the interface with the default route. In this example it is ISP1.
In the IPsec -> Installed SAs screen we can see the addresses between which the IPsec tunnel is installed. In this example, 1.0.0.2 is the address on interface ISP1.
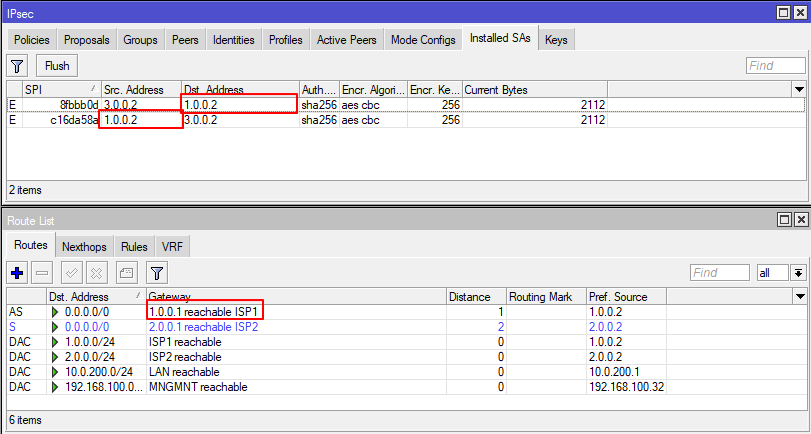
In case ISP1 becomes unavailable, the tunnel will automatically be established from the ISP2 interface.
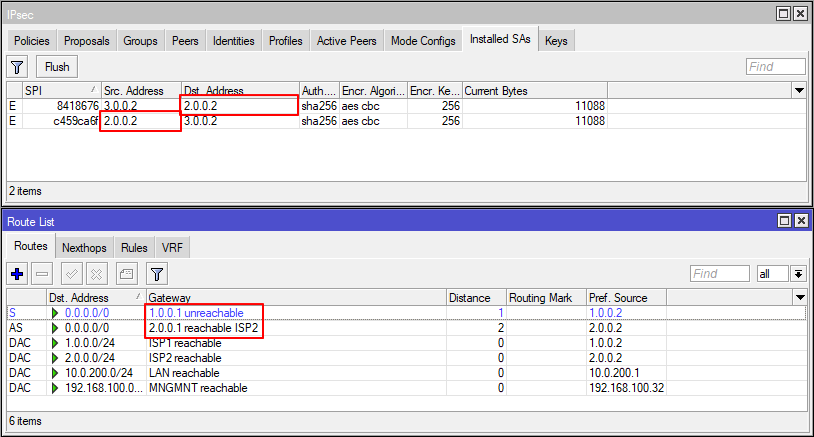
In the event that ISP1 becomes available, IPsec will still be run through ISP2.
Restarting the IPsec tunnel through the primary ISP (optional)
In order to "restart the tunnel" through ISP1, you need to remove the IPsec SA when ISP1 becomes available.
Go to Tools -> Netwatch.
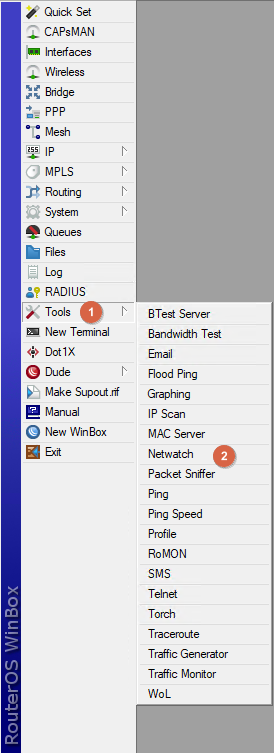
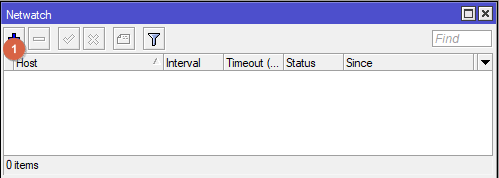
Create a new element Netwatch.
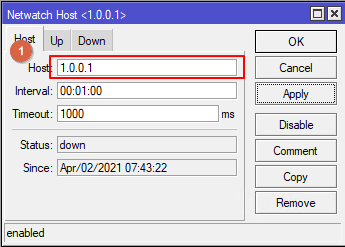
On the Host tab, in the Host field, enter the Default Gateway address for the ISP1 interface. Leave the Interval and Timeout settings at their defaults.
Note: If the interval is less than 1 minute, the default route may not have time to change and the tunnel will be reestablished through ISP2.
On the Up tab, enter the command to delete all IPsec SAs and save by clicking OK.
/ip ipsec installed-sa flush
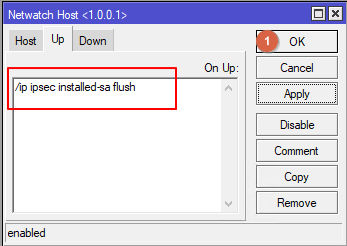
With this setting, if ISP1 goes from Down to Up, within 1 minute (the Interval parameter from Netwatch) all IPsec SAs will be removed and the tunnel will be installed through the interface on which the default route is currently ISP1.
Configuring Firewall on Mikrotik
Go to IP -> Firewall.
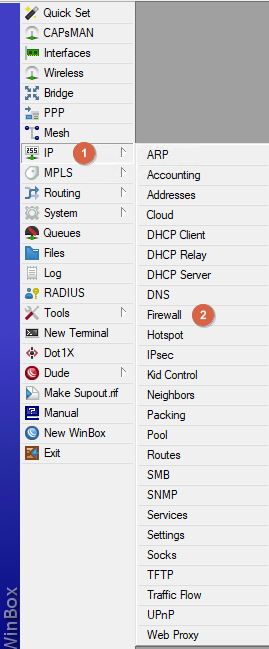
On the Firewall -> Filter Rules tab create two accept rules in the Forward chain to pass traffic through the IPsec tunnel from the network behind the Mikrotik to the network behind the Edge Gateway and vice versa.

On the Firewall -> NAT tab, create two accept rules in the srcnat chain for traffic going from the network behind the Mikrotik to the network behind the Edge Gateway and vice versa. These rules should be higher in the list than the Masquerade rule used to access local subnet clients to the Internet.

On the tab Firewall -> RAW create two accept rules in the prerouting chain, from the network behind the Mikrotik to the network behind the Edge Gateway and in the opposite direction.

The Mikrotik configuration is now complete.
