To deploy the UserGate image in your virtual environment, you will need to follow these steps:
1. In the VCD (Virtual Cloud Director) interface, navigate to the "Virtual Machine Management" section.
2. Click "NEW VM" to create a new virtual machine.
3. In the new VM setup window that appears, fill in the virtual machine name and computer name (hostname).
4. Find and select the "UserGate_6.1.8" image from the list of available images.
5. Click "OK" and wait for the new virtual machine to be created and launched.
6. To ensure proper operation of UserGate, you will also need to prepare your VDC's network infrastructure.
Create three local networks:
1. Routed network management with an address of 192.168.1.1/24. This network is used for device configuration, including initial setup. The UG's web interface is only accessible to clients on this network. Management and monitoring services available: admin console (web), SSH CLI, ping.
2. Isolated network trusted with address 10.0.0.1/24. This network connects client VMs for which UG acts as a gateway. A DHCP server is configured for this network in UG. Standard network services allowed: ping, DNS, HTTP(S) proxy, Authorization Agent, SMTP(S) proxy, POP3(S) proxy.
3. Untrusted network addressing 192.168.2.1/24 used as a gateway to the internet. We need to add an SNAT rule to NSX EDGE for this network to access the internet. Services available for this network: ping, SMTP/POP3 proxy.

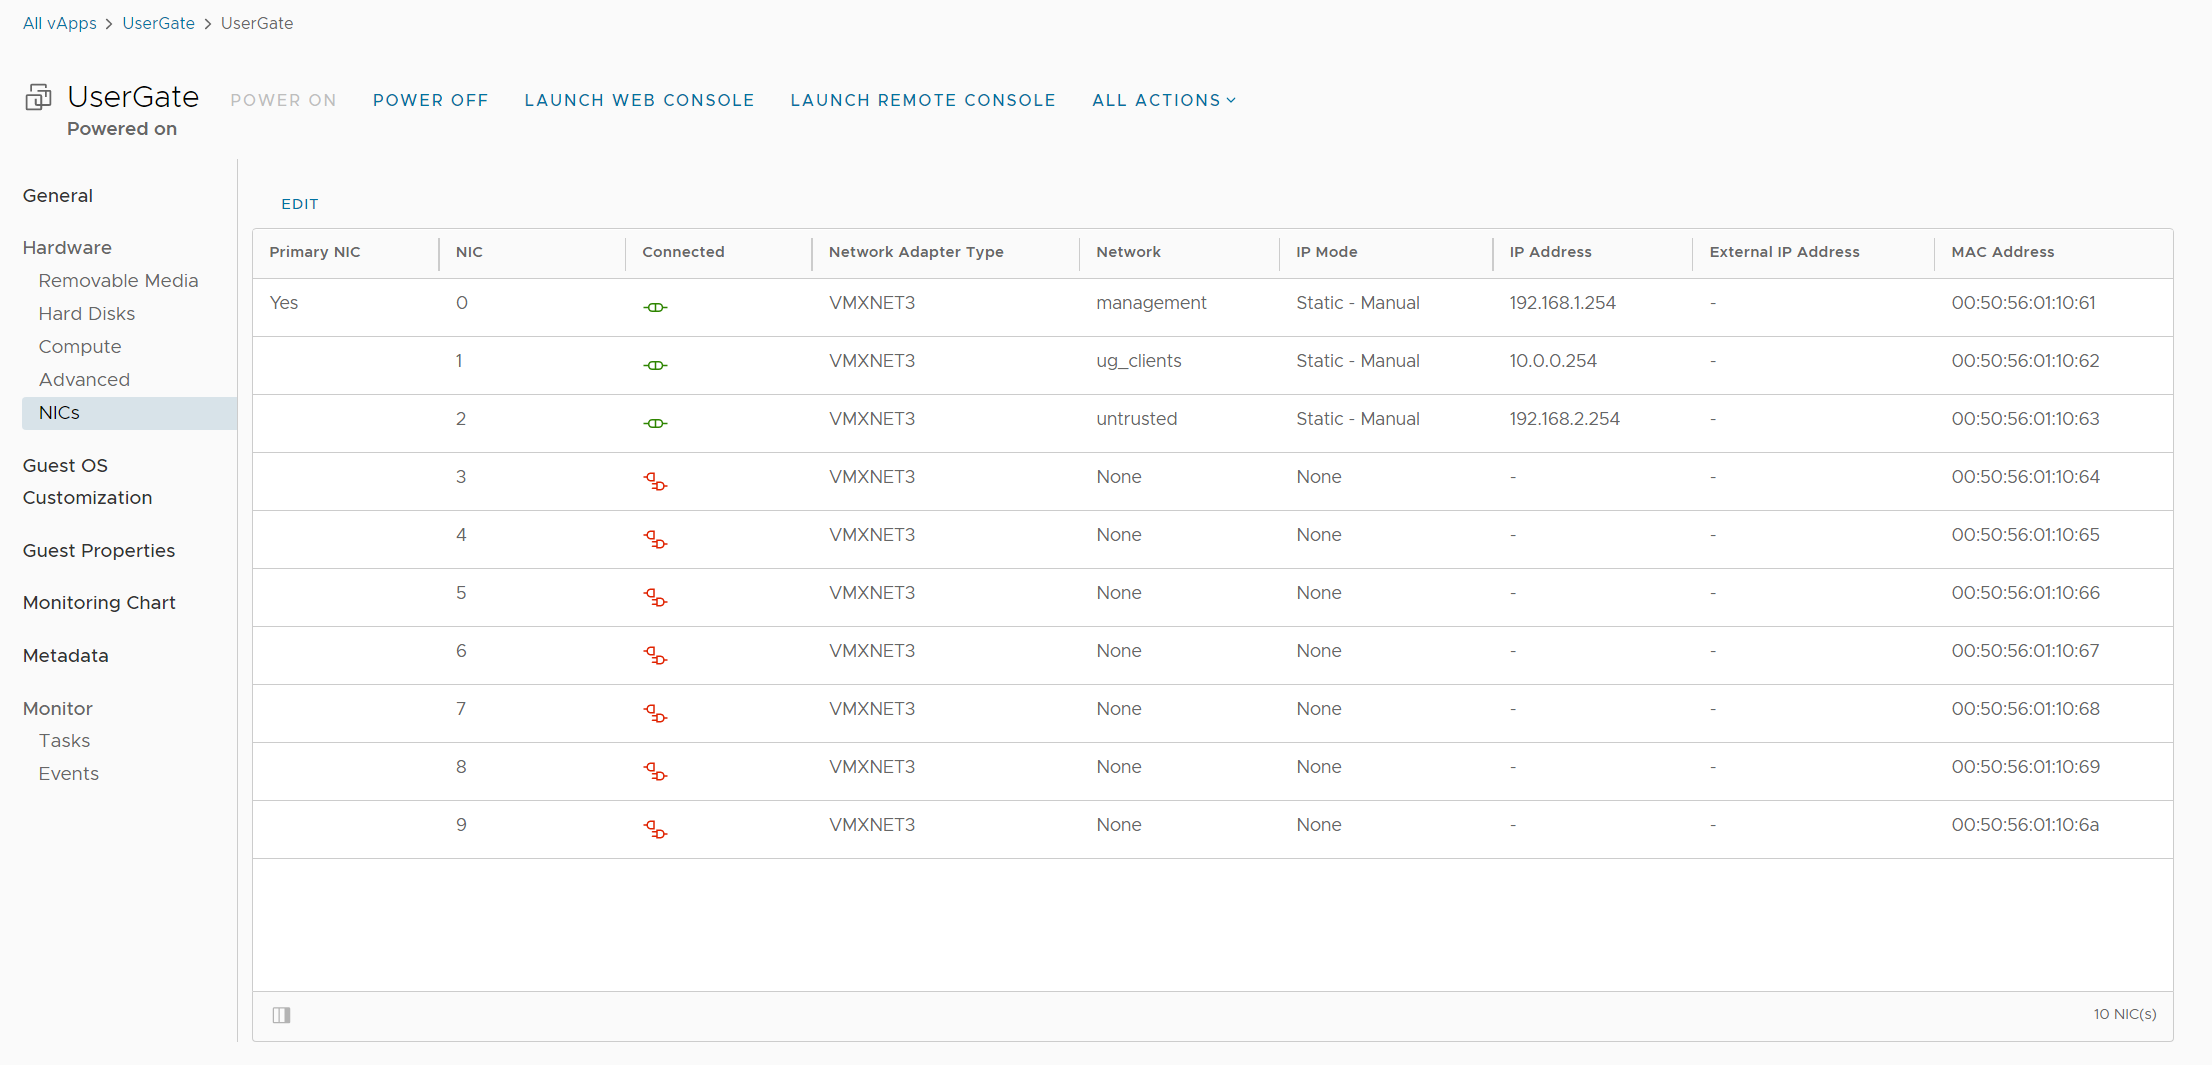
The networks need to be configured in VM UserGate, as shown in the screenshot.

Assign IP addresses statically, based on each network:
nic0 - Management - 192.168.1.254
nic1 - Trusted - 10.0.0.254
nic2 - Untrusted - 192.168.2.254
NSX Edge configuration:
Due to the peculiarities of VMware architecture, it is not possible to completely exclude NSX EDGE.
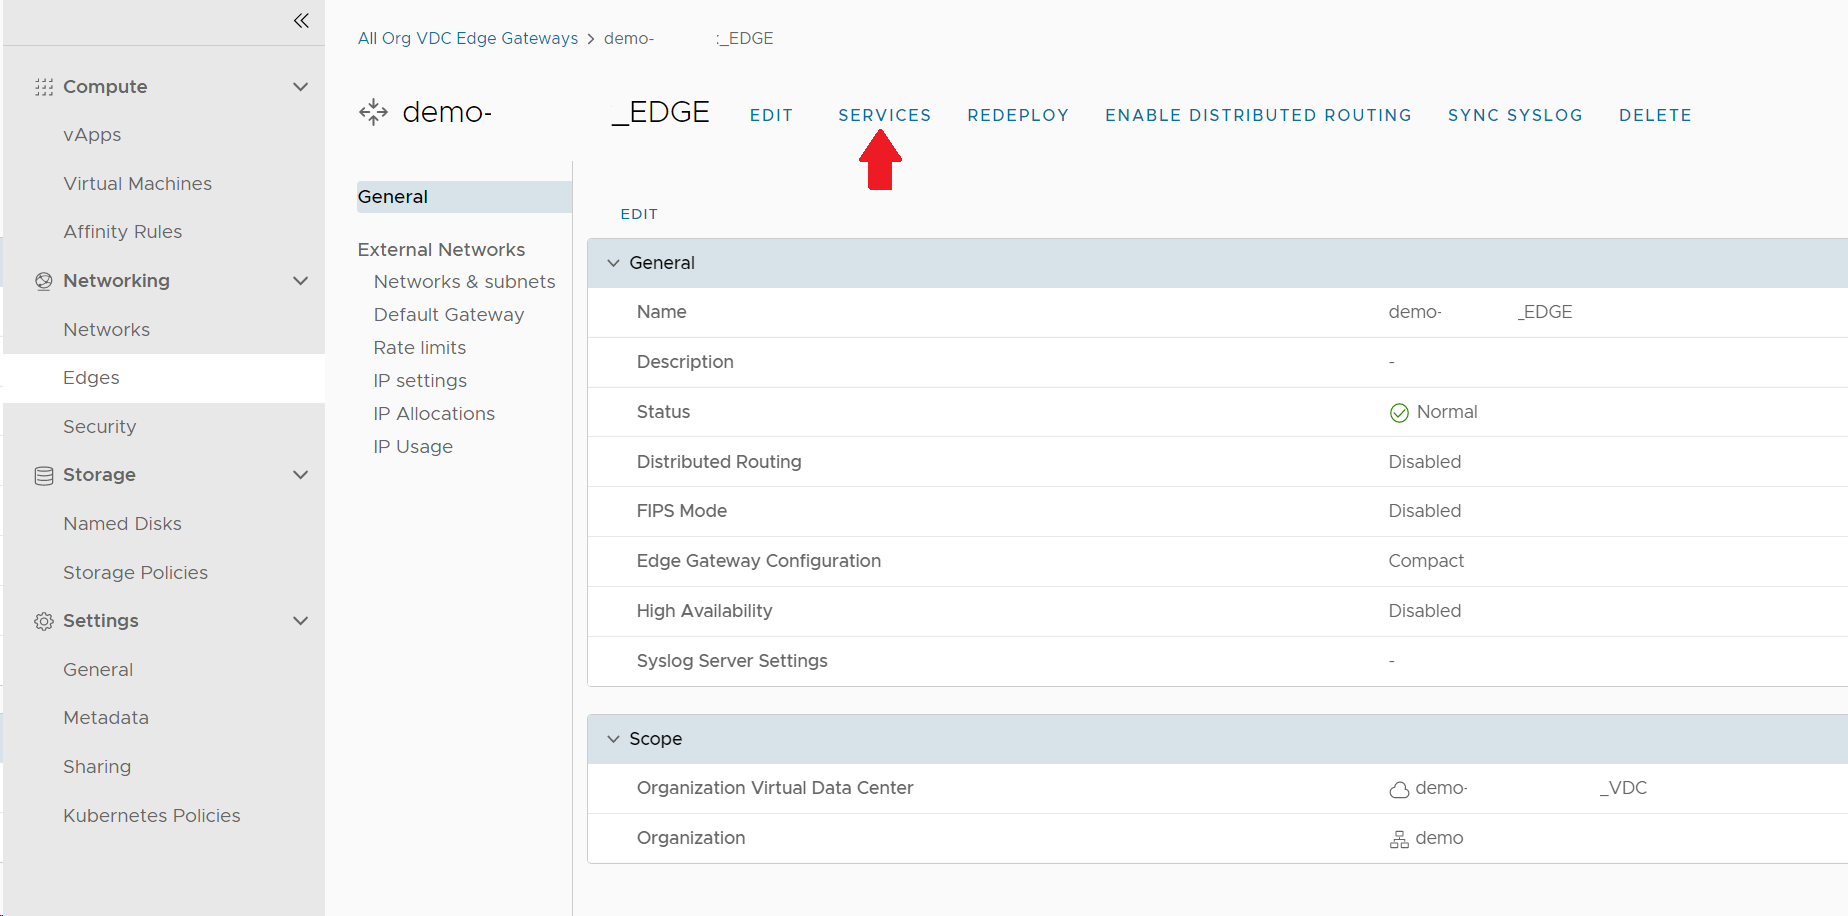
However, you can add a rule to swap the IP address of the UG (Unified Gateway) from the untrusted network with the external IP address of your organization. To do this, go to the Edges section, select your Edge, and then go to "Services".

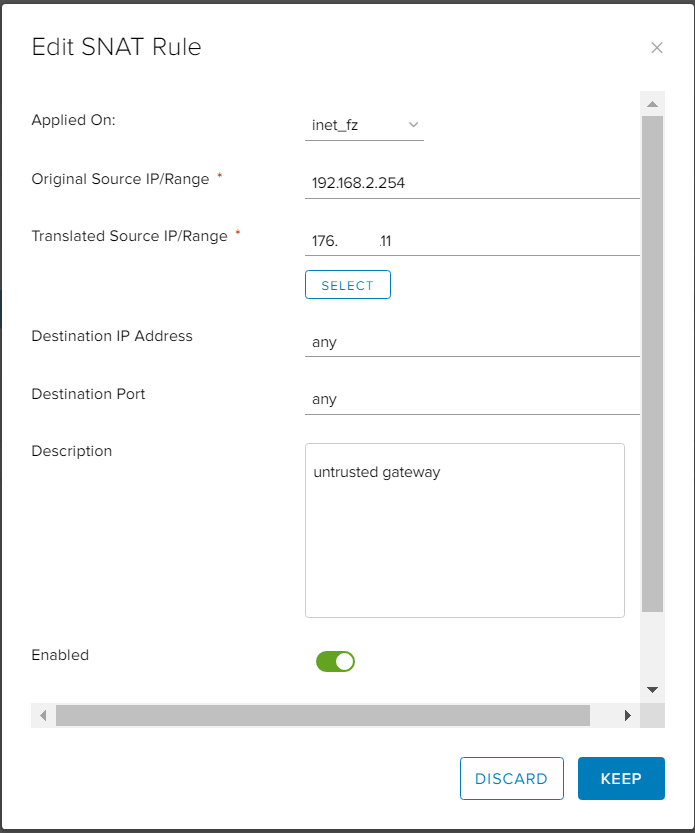
In the Edge, select the "NAT" tab in the services, and create an SNAT rule. In this rule, specify your external IP address and UG address for the untrusted network 192.168.2.254.

After completing the configuration, you can enable UserGate, and the web interface will be available to clients on your management network. If you encounter any issues, our technical support team is available 24/7.
Useful Links
