Overview
We provide a preconfigured template for video surveillance using the free version of SecurOS Lite software.
Key advantages:
- unlimited license validity
- unlimited video archive storage
- supports up to 32 IP cameras (video+ audio channels)
- compatibility with 10 000+ models from leading manufactures
- web-client access (including SecurOS WebConnect)
The template labeled WIN2016-RUS-SecurOS is available in our Public Catalog. Deployment follows standard procedures
Important Notes
Prerequisites
-
A VPN-capable router is required on the client side for proper operation.
Critical Consideration
-
Do not change the computer name after deployment, as this will prevent SecurOS from running. Renaming can be performed later if necessary.

Figure 1. VM control panel - VMware Cloud Director
Recent Update
We have enhanced this template with a Telegram alert feature, which notifies you of camera activity during off-hours (configurable time frames). The alert includes:
-
A real-time snapshot from the triggered camera.
Deployment & Initial Setup
-
Launch SecurOS Lite from your desktop.
-
Log in using the default credentials (change after initial setup):
-
Username:
root -
Password:
securos2006
-
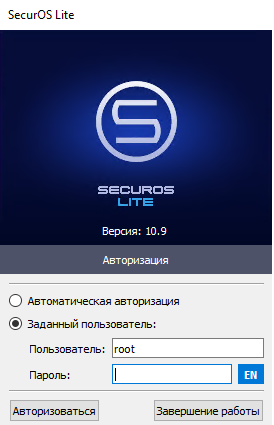
Upon successful login, three primary panels will open (Fig. 2):
-
SecurOS Lite Control Panel (Main settings and system management)
-
SecurOS Media Client (Live camera monitoring)
-
Health Monitor (Processes, errors, and signal tracking)
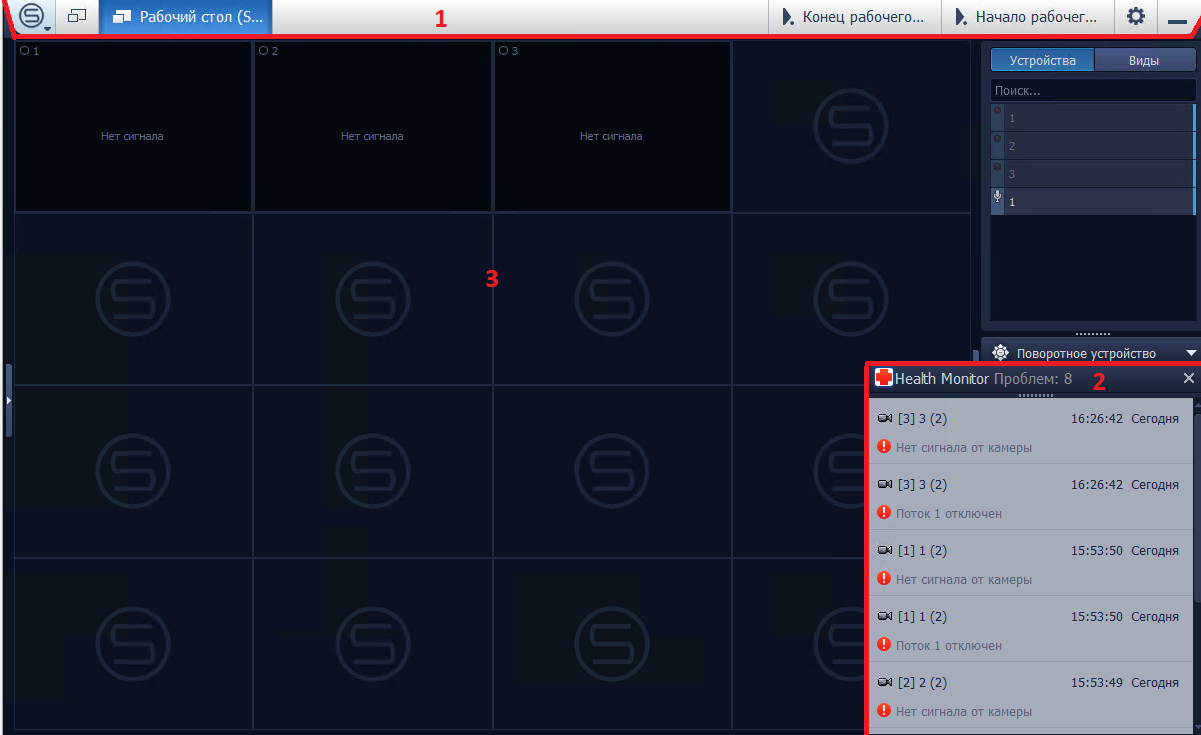
Figure 2. SecurOS software interface
Configuration Guide
Accessing System Settings
Click the gear icon (top-right corner of the SecurOS Control Panel) to open the System Manager, which includes the following sections:
-
Users & Permissions
-
Archive Export Profiles
-
Layouts & Views
-
Event Filters
-
Macro Commands
-
Maps
-
Schedules
-
Servers & Workstations
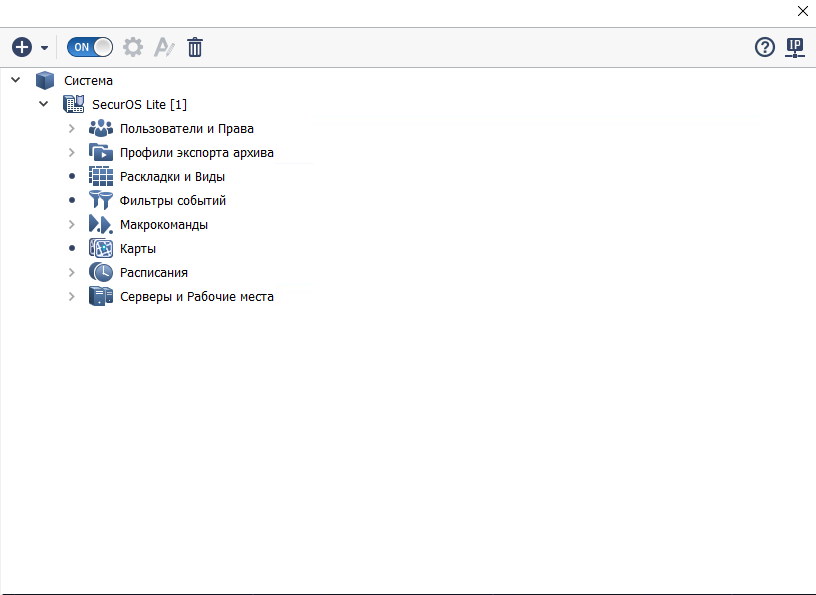
Figure 3: SecurOS System Configuration Manager
Preconfigured Settings
The WIN2016-RUS-SecurOS template includes predefined configurations:
-
Two pre-added video capture devices
-
Recording modes (working vs. non-working hours)
-
Automated actions (trigger-based responses)
Adding New Cameras
-
Navigate to Devices (Cameras & Microphones).
-
Click the green "+" icon (Fig. 4) to add a new device.
-
Enter the camera name, select the model, and specify the connection type.
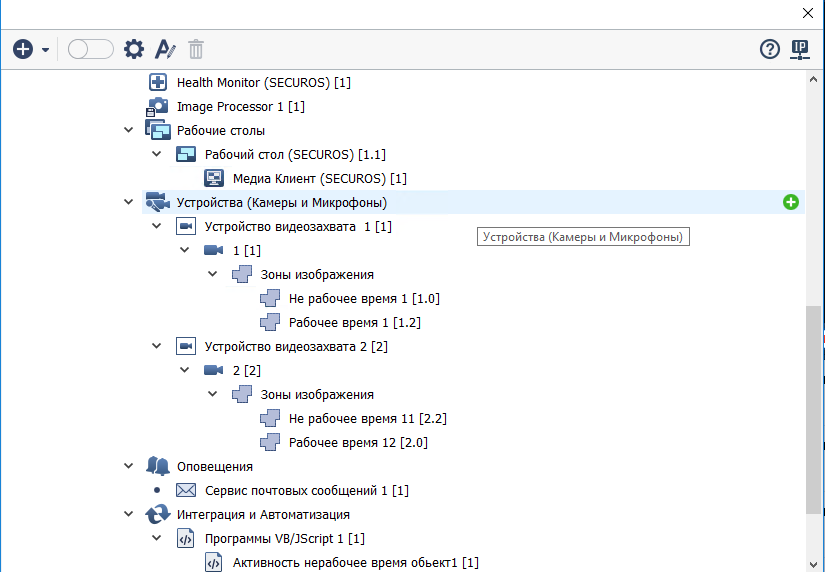
Fig. 4 SecurOS Settings Manager - Devices (camera and microphones)
-
In the connection window, input:
-
IP address
-
Login credentials (if applicable)
-
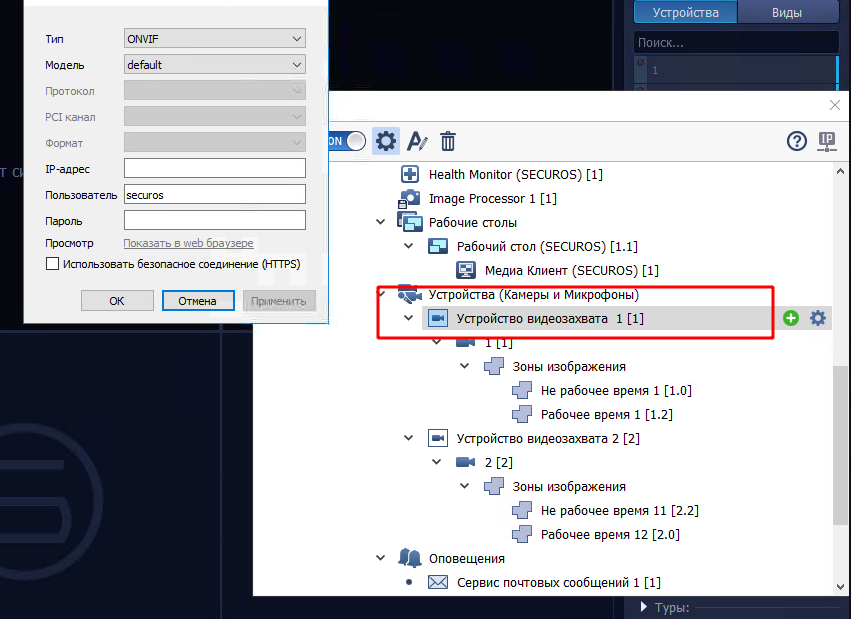
Fig.5 SecurOS Settings Manager - Settings for connecting video capture devices.
Motion Detection Zones
Creating Zones
Each camera requires two detection zones:
-
Working hours zone
-
Non-working hours zone
Zone Configuration (Fig. 6)
-
Define alarm-triggering areas.
-
Adjust brightness/contrast to minimize false alarms.
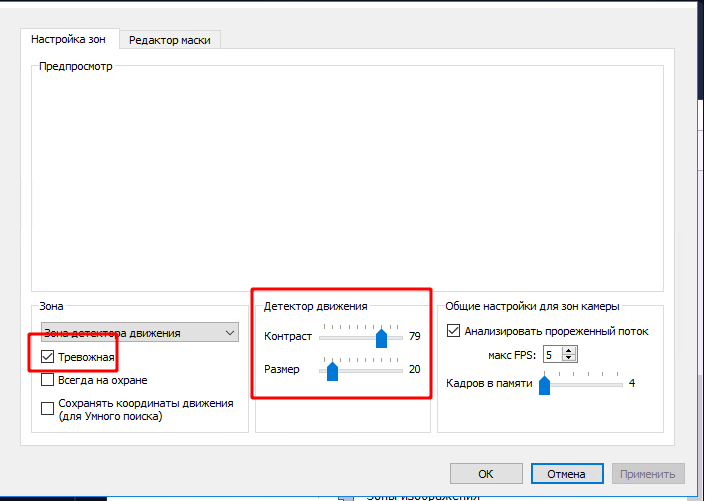
Fig. 6 Video Capture zone Settings panel
Mask Editor (Fig. 7)
Exclude static/moving objects (e.g., blinds) from detection.
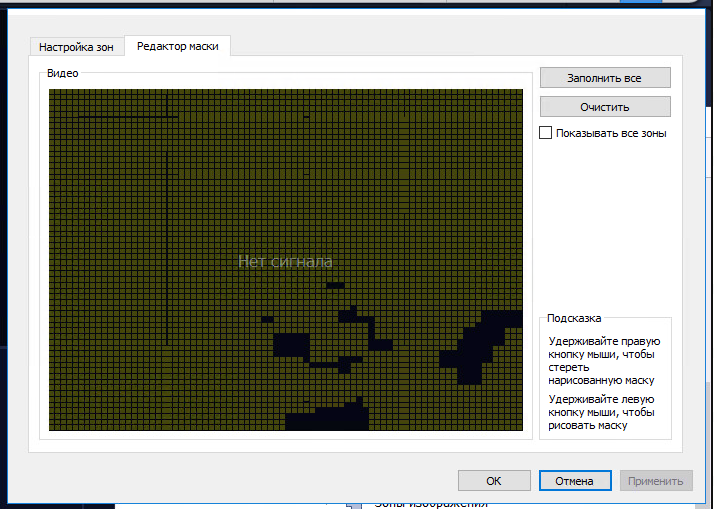
Fig. 7 Video Capture Zone Settings Panel - Mask Editor
Schedule Setup
-
Navigate to the Schedule tab.
-
Define non-working hours (when motion triggers Telegram alerts).
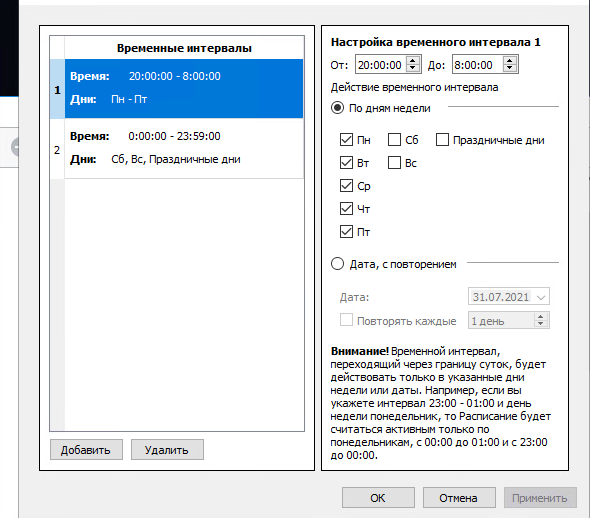
Fig. 8 Schedule settings panel
Macro Commands
Preconfigured Macros
The template includes two macros:
-
Start of Working Time
-
Disarms non-working zones; arms working zones.
(Fig. 9)
-
-
End of Working Time
-
Disarms working zones; arms non-working zones.
(Fig. 10)
-
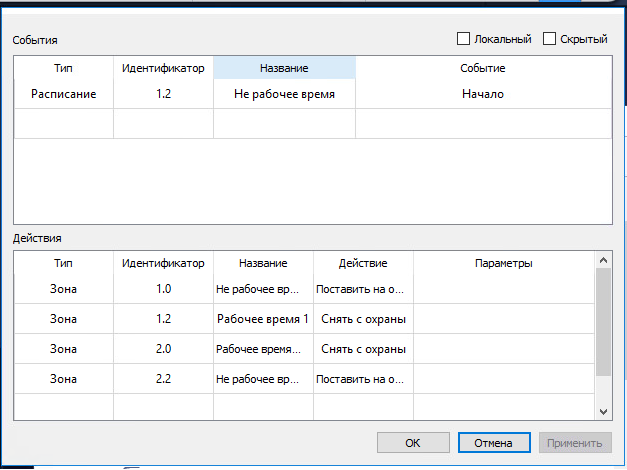
Fig. 9 Macro command settings panel - Start of working time
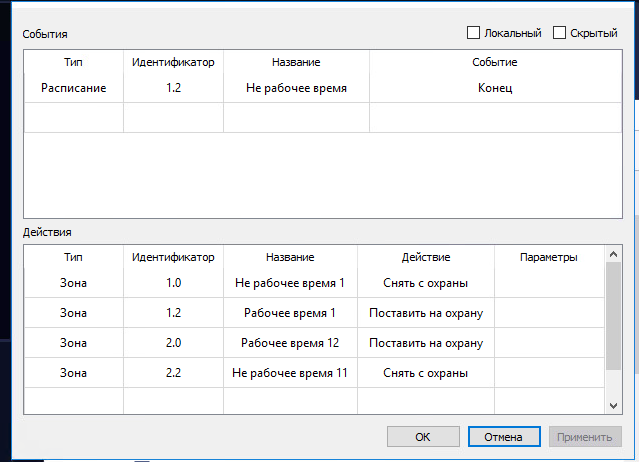
Fig. 10 Macro commands settings panel - End of working time
Telegram Alert Integration
Script Location
Navigate to:
Servers & Workstations → SecurOS Computer → Integration & Automation → VB/JScript Programs
Preinstalled Scripts
Two scripts are included (one per camera):
-
"Activity After Hours - Object [X]"
-
Triggers on motion detection.
-
Captures a snapshot (
C:\Export\image_msk.jpg). -
Executes a PowerShell script for Telegram alerts.
-
-
Telegram Notification Script
-
Sends the snapshot + alert to a designated chat.
-
Customizing Scripts
-
Edit Script #1:
-
Update
CAM_ZONEand device IDs. -
Modify the PowerShell script path (Line 8).
-
-
Edit Script #2 (
send_alarm_obj1.ps1):-
Replace
ВАШ TOKENandCHAT IDwith your Telegram bot credentials.
-
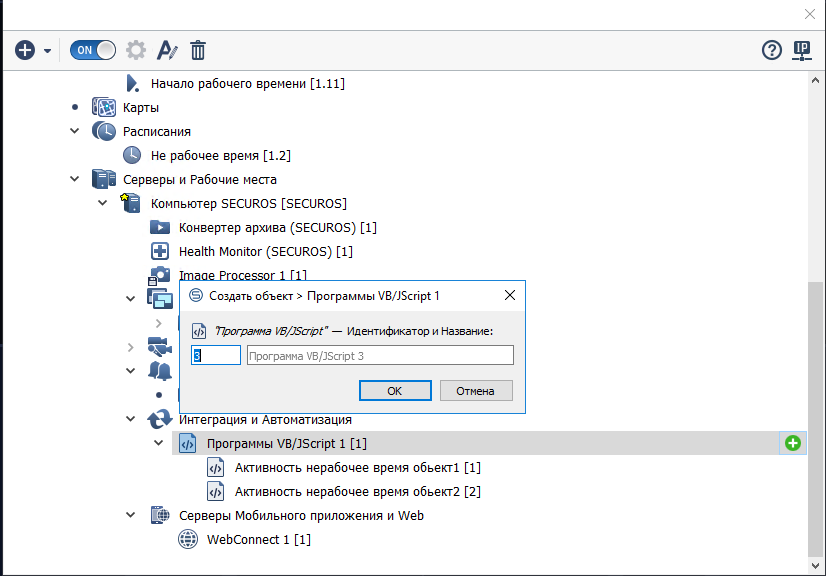
Fig. 11 Adding a new script
Additional Resources
For further guidance, refer to the SecurOS Documentation.
Network Configuration of VMware Infrastructure (NAT, DHCP, Firewall, Static Routing, VPN)
