User interface in the SpamTitan account
The SpamTitan account is useful for checking the overall statistics of outgoing and incoming email filtering for spam and virus content, as well as for resending mail that has not been processed by the rules and generating reports for the period you are interested in. To log in use your email account and password from the welcome email (fig.1):
Figure. 1 SpamTitan login panel
After logging in you can select the role and domain you wish to check statistics for (fig.2):
Figure. 2 Role and domain selection panel
You can also switch to another domain if you have several domains linked to your e-mail address. To do this just click on the domain name in the upper right corner and select another domain.
On the main screen (Dashboard) you have access to general statistics on the filtering rules worked out and a summary of the last seven days.
Blacklist/ Whitelisting
In the Domain Blaclklist section you can specify the blocked senders from a specific e-mail or an entire domain (fig.3).

Figure. 3 Inbox blocking settings panel.
In the Domain Whitelist section you can specify allowed senders from a specific email or an entire domain in the same way as Domain Blacklist.
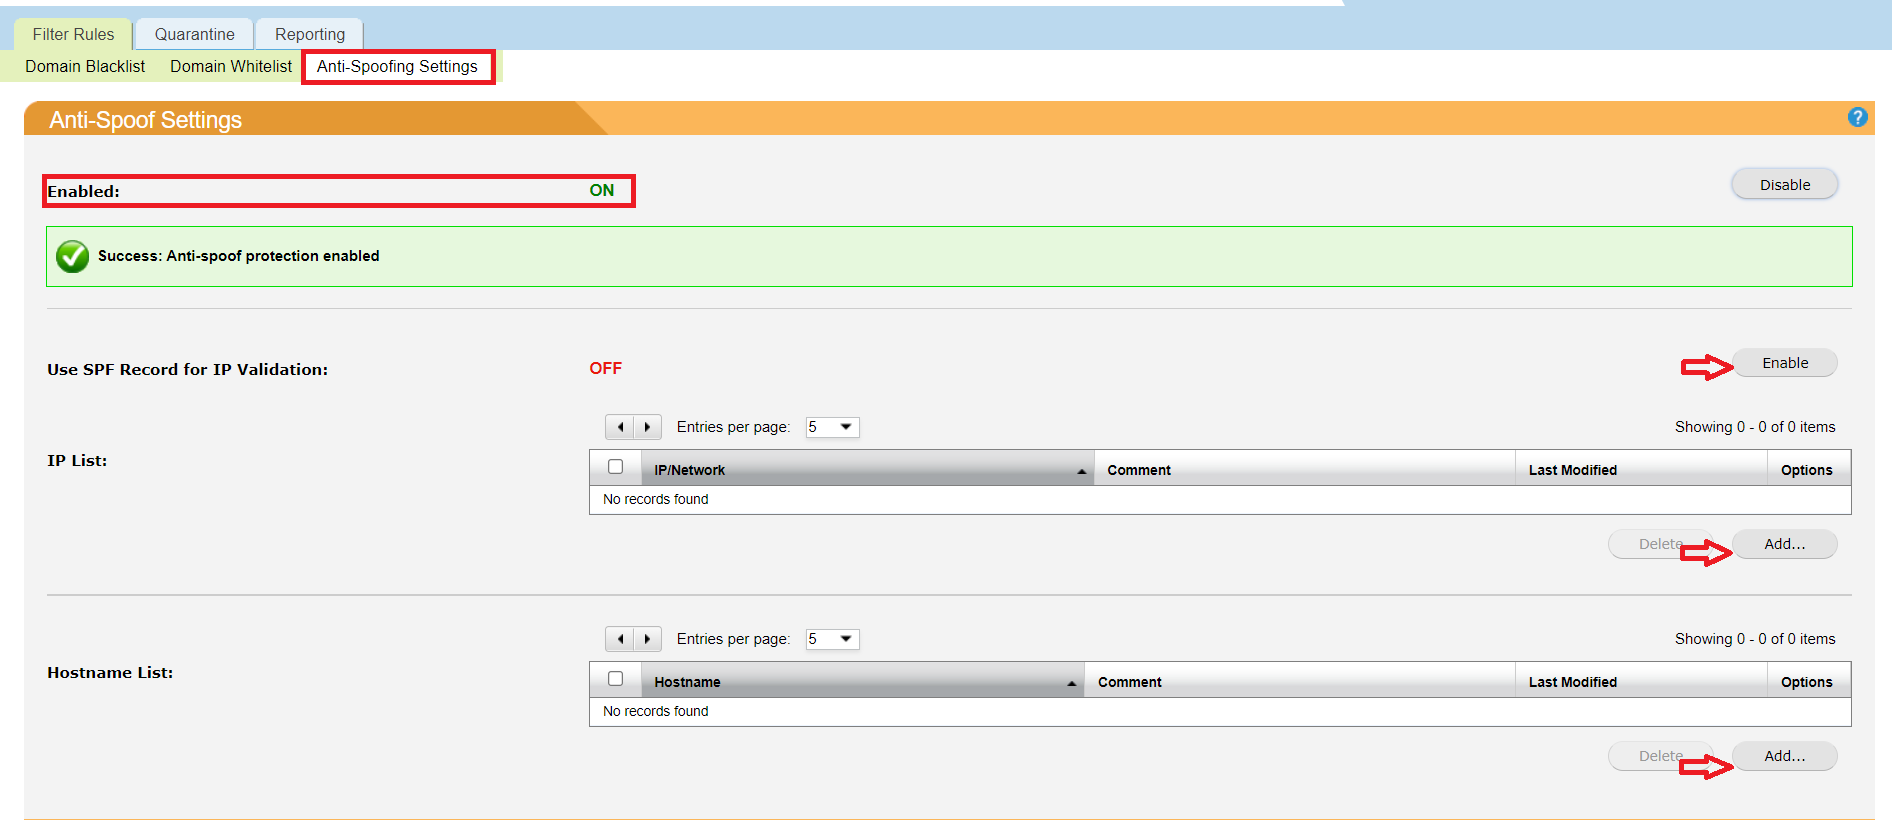
Anti-spoofing settings are also available to you (Figure 4). 
Figure. 4 Anti-Spoofing settings.
By enabling this option you can access the following settings:
- SPF record check. If this option is enabled, the other options are unavailable;
- The list of allowed IP addresses from which email may be sent using your domain;
- Allowed list of host names from which email is sent;
Quarantine
The Quarantine section displays messages that have not passed the mail filtering rules (fig. 5 and 6).
You can do the following with quarantined messages:
- Resend a message (Release);
- Add to whitelist (to further filter similar messages/sender);
- Delete a message;


Figure 5 and 6. Actions with quarantine section
Reports
The reports section includes a history of the processed emails and actions performed on them. You can generate reports based on various criteria, as well as send and view archive reports.
You can customize reports to monitor the amount of mail a particular domain/mailbox receives for a specific period. To generate a basic report select Reports. Select the criteria and when you finish, click Run to generate the report (fig. 7).
Figure 7: Generating a report
You can also send (Shedule Reports) or download a report (Todays Reports) in a convenient format (Figure 8)
Figure 8. Actions with the generated report.
